Hard landscaping case study
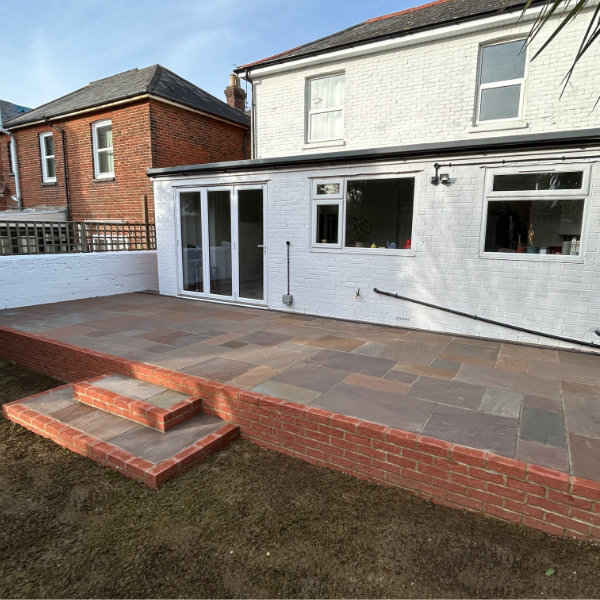
This raised Indian sandstone patio was our first project of the year (2024)
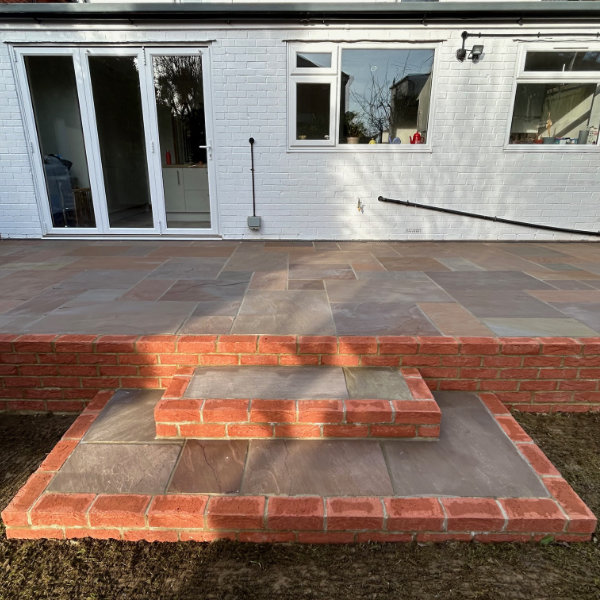
Firstly we started by taking up the loose tiles and removing grass/weeds from the area. Next step was to dig footings for the retaining wall, once this was completed we started building the wall, all heights where governed by the sill of the patio doors as this was the customers preferred finished height.
Once the wall had cured fully we could then make a start on the sub base to the patio, an integral part of any patio install, ultimately a poor sub base will result in movement and failure of the new paving in the months/years to come.
We moved a total of 14 ton of material in total get to required height, this consisted of 6 ton of (large) crushed rubble evenly spread and compacted and then finished of with 8 ton (5 inches) of type 1 mot also compacted, all of which was installed above a layer of dpm which suppresses the weeds and prevents material migration.
At this point we were up to our required height and able to start laying the paving.
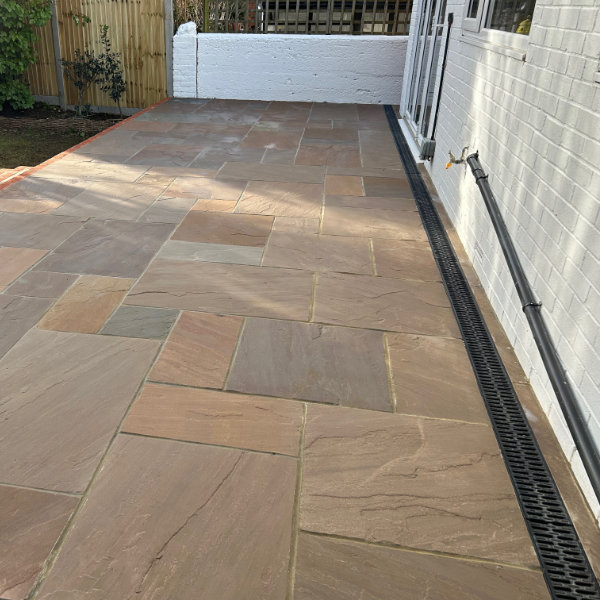
Firstly we installed the Aco channels parallel to the back of the property, this is so we had two finished heights to work from as our fall was running from top of retaining wall to Aco channels.
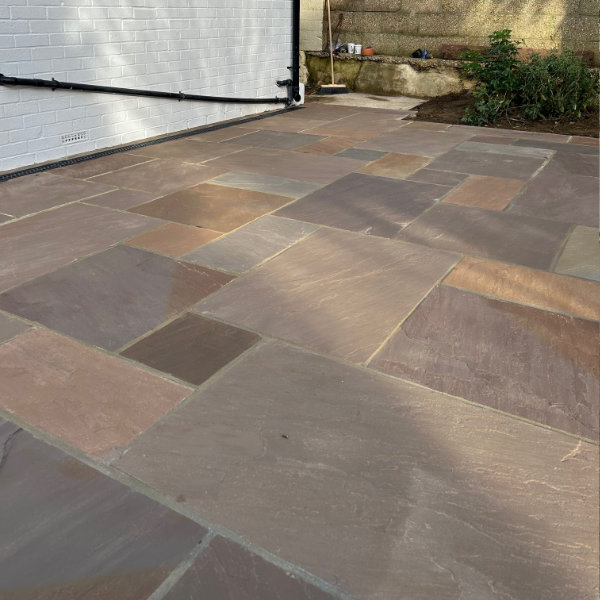
Next step was to start laying the paving, the customer chose a Indian sandstone product, these come in a wide range of colours and styles but in this case we where installing the Raj blend which is one of the more popular colours with our customers.
All paving is laid on a full (wet) mortar bed using a fine sharp sand, which is industry standard, ring or spot bedding is not suitable as the paving is not fully supported and can allot for movement. Secondly it creates perfect conditions for ants etc to thrive and thirdly reflective staining can occur, this is where the mortar bed is mirrored on the top of the paving ruining the appearance.
As well as full mortar bed we use a product called a slurry primer, this helps the paving adhere to the mortar bed, if slurry primer is not used then the porous sandstone will draw the moisture from the mortar bed and not adhere, the use of primer is integral to any patio lasting the test of time.
We create individual patterns for all our mixed sized paving projects, ensuring there are no cross joints, this means each patio we install is completely unique.
Once the patio had been fully laid we then started on the pointing, there are two options for this, firstly there is the traditional sand/cement mortar which tends to be more in keeping with older properties and this is what the customer chose on this occasion. Secondly there is the resin based brush in compounds, these come in various different colours.
While the pointing mortar was drying we installed the concrete slab for the steps and built steps central to the patio as requested by the customer.
Once the pointing had cured we cleaned the patio using a very mild mortar cleaner and a pressure washer.
Only when the patio had fully dried could we move onto the final step in the process. This is the application of a breathable sealer. This serves to protect the patio from black spot and algae growth, limiting the maintenance and improving the durability of the product. The sealer also enriches and brings out the colours in the paving however it can come in an invisible finish.
Customer was very happy with the final outcome and we recently returned to repoint the whole main house and complete some brickwork for them.
traditionial repointing case study
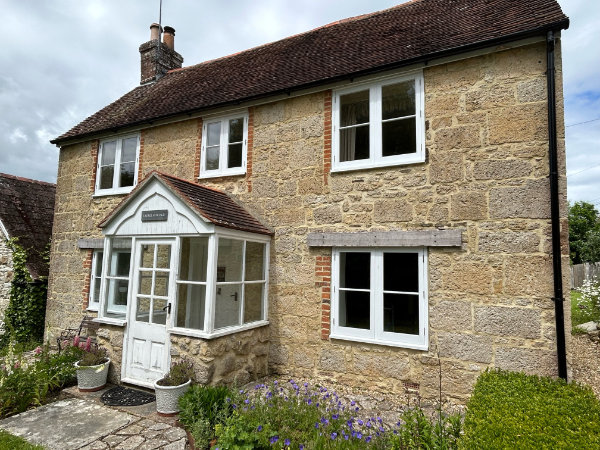
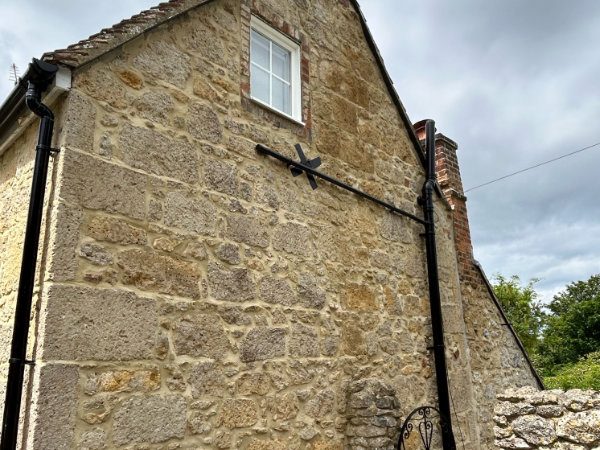
Situated in a conservation area on winkle street in calbourne Isle of Wight, this 250 year old property had been patched in with various cement mortars down the years.
Upon inspection it was clear that the negative effects associated with cement mortar repointing on lime built properties was beginning to take hold.
Moisture is effectively trapped in the wall making the property cold and damp for longer. Secondly some areas of stone had begun to crumble and “shell” as a result of the cement mortar. This is caused by the moisture retention in the stone, the cement stops any moisture coming out through the easiest possible route (lime) this issue is not just isolated to stone properties, we have had many jobs in the past where we have had to exchange 200+ bricks from lime built properties.
We started by sympathetically removing all the cement pointing, this was done using a combination of SDS hammer drills, hand tools and grinders.
Once removed the wall is cleaned and saturated to help the new mortar adhere to the joints and to help slow the curing process down.
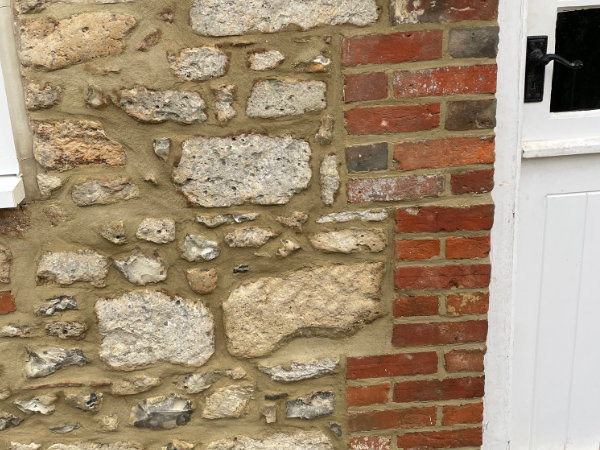
We used a natural hydraulic lime mortar (3.5) mix with 1 part grit and 2 parts soft sand. We push the mortar into the joints using a finger trowel to make sure the joint is full and avoid cracking. The next step is to carve the like mortar back to reveal the contours of the stone making sure the pointing is flush with the face of the masonry. Thirdly using a churn brush we hit the joints to compact the mortar and bring out the aggregates, this helps breathability, prevents cracking and gives structural integrity to the new lime mortar.
The benefits of the new lime mortar will help to preserve this period property for years to come, protecting the original stone, allowing the property to breathe keeping it aesthetically pleasing on the eye.
This was an enjoyable project for the team and I, one of our favourites to date.
We look forward to carrying out many more projects like this one in the future.
Our clients say...
Over 17 years experience
Isle of Wight repointing and hard landscaping specialists
